top of page
Patterns

I chose this picture because I liked the pattern of the rocks and the grass. First, I moved the tint to a light green to make the grass stand out more. In this picture I also adjusted the whites, upped the clarity, and even added a faded white shadow. For this picture I wanted to give it more of a brighter feel and make it stand out more.

I chose this picture because I liked the look of the tiles and there patterns. At first this picture came out really blurry so my goal was to clear it up by adjusting the blacks and whites to make the colours stand out more. I also for this one added a black faded shadow to it and give it more of a darker feel.

Camera Simulator
I took this picture because I really liked the pattern of the marble countertop. What I did to edit this was, change the temp to blue, change the vibrance to blue, lower the highlight, and added a light shadow. For this picture I went for more of a colder bluish colour.
Aperture priority
The girl is in focus, the background and the wind wheel is blurry.


Shutter Priority
In this picture the wind wheel is in focus and the background is out of focus.
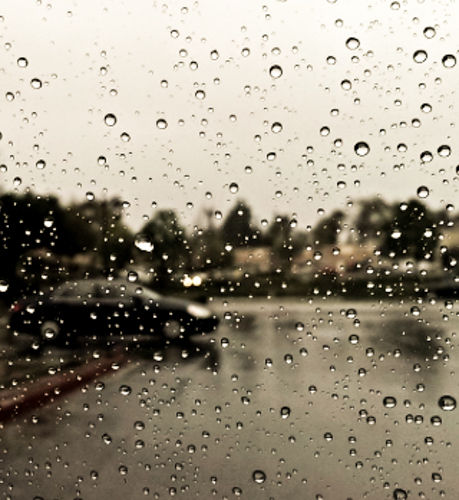
Rain

In this photo my goal was to make the reflection of the rain stand out by increasing the whites, clarity, and exposure.
In this picture it was dark so I made it lighter by increasing my whites, and gave it more of a warm feel by changing it to a light yellow tint. Also I made it more clear by increasing the clarity and exposure of the photo.

In this picture I made the whites stand out and gave it a blurry effect by lowering the clarity and increasing the whites. I also decreased the shadows to make the white stand out more.
Before

After

To edit this man, first I white balanced the picture and made it more clear. Next, I cleared his skin up by using the heal tool. After that, I made his teeth more white and his eyes stand out. Then, I made his cheeks less red and finished by making his wrinkles fade.
Fall

For this picture, I wanted to make it have the fall feeling so I changed the tint slightly to the yellow side. I also made the whites stand out and upped the clarity to make the picture more bright and clear.

At first this picture was very dark and unclear so to fix it first, I made the whites and highlights stand out, I lowered my blacks, and then finally increased the clarity.

For this picture I wanted it to have the fall feeling again and I also wanted to the leafs to stand out so I made it brighter by increasing the whites, highlights and clarity. I also made the tint slightly yellow to match the colour of the theme
Bicycles

For this picture I wanted to go with the blue themed colour so I changed it to blue tint and also increased the shadows, highlights, and clarity.

For this next picture I did almost the same as the first but instead of blue I changed it to red tint, then increased my shadows, highlights, clarity, and exposure.

For this picture I did a green tint but in this one gave it a blurry effect and decreased my clarity. Then I lowered my shadows, increased my white and highlights with a little bit of exposure.
Halloween

For this picture I loved the clarity and gave it a blurry effect, aswell as made my whites stand out more by increasing them.

For this picture I gave it high shadows and also increased my blacks to give it a darker halloween look.
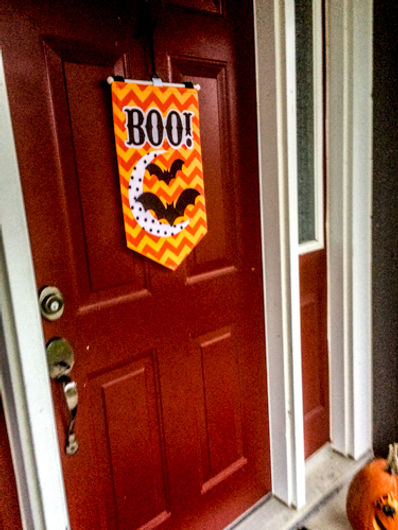
In this picture I increased my clarity and also slightly increased my blacks and shadows to give it a darker clearer look.
Collage Pictures

First, I cropped out the edges, then to edit this picture I increased the clarity and the whites to make it stand out more.

Like the other picture, first I cropped the outer edges. This picture was very dark at first so I lowered the blacks and shadows, then increased whites and clarity to make it less dark.

For this picture it had a yellowish tone to it, so first I made the tint slightly blue, then increased clarity to make it less yellow and more clear.
bottom of page